
Home automation explained
In this post I will explain how you can create your home automation system using a simple Raspberry Pi.
This setup has been running flawlessly at my home for two years. It is capable of:
- Automate switching all kinds of devices and lights (both WIFI connected devices as well as 433 Mhz)
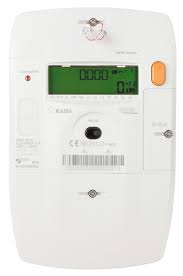
- Get telemetry of your gas- and electronic usage
- Switch KlikAanKlikUit devices (433 Mhz) using only a few cheap components!
Note on the 433 Mhz receiver and sender assembly. There are also off-the-shelf products available such as RFXCOM These products will offer better results and are more feature rich. The do-it-yourself setup described here is not suitable for receiving a continuous flow of data from devices such as weather stations. Because I do not have such devices and I only use it to operate a handful of klikaanklikuit switches this solution works perfect for me without the added costs of a commercial product.
As a second side note, I try to avoid the Mhz switches as much as possible because they are less reliable due to the one way communication. Devices connected to your WIFI network are much more reliable in that respect. The combination of using WIFI connected devices and Domoticz opens a whole new chapter of possibilities that goes beyond the scope of this blogpost. But to just give you some directions have a look at Sonoff and the custom firmware you can flash on these ESP8266 operated devices such as Tasmota or ESPEasy. The possibilities are endless, because it is possible to connect all types of Arduino based sensors to these things.
Hardware
Since this setup will be running Domoticz as home automation system a Raspberry Pi 2 will be more than enough CPU power to handle this. Because this server is on -all day- it is good to minimize the power consumption, so no need for a Raspberry Pi 3 or 4. I have also tried to run this on a Raspberry Pi Zero, but without reliable results. It is recommended to have a UTP networking connection (so no WIFI).
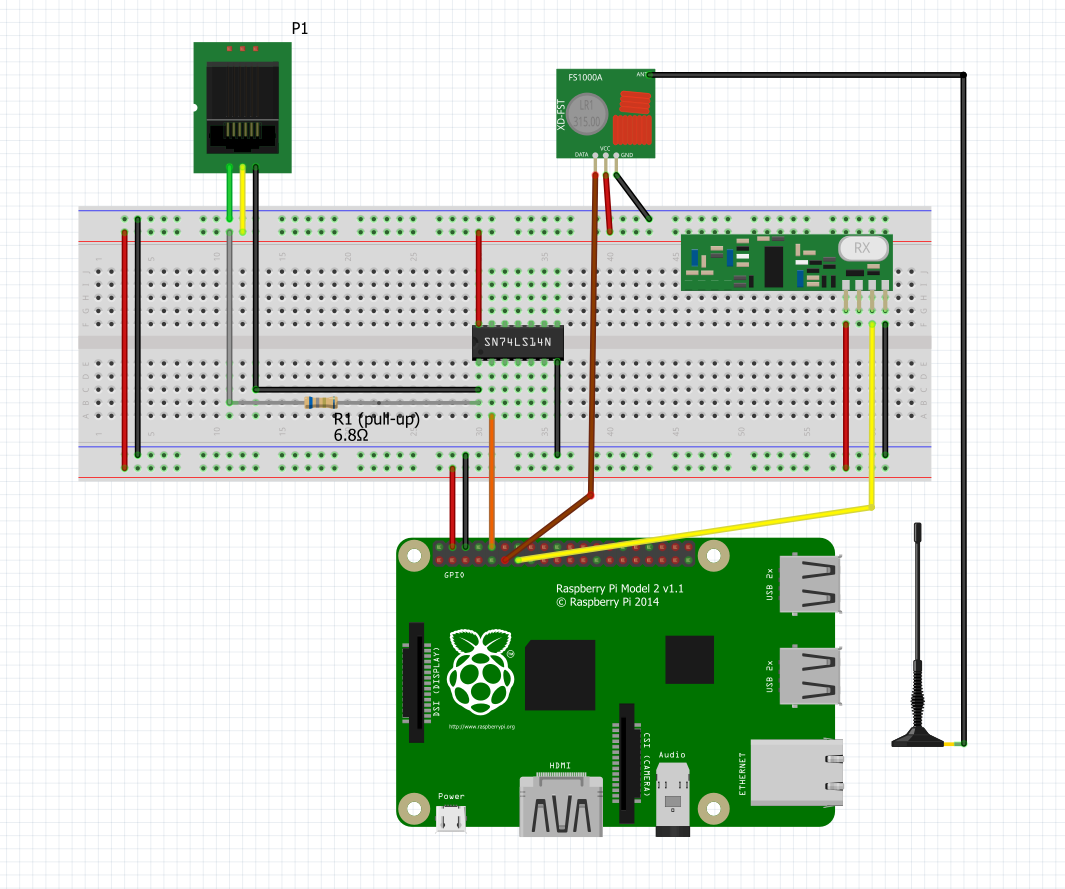
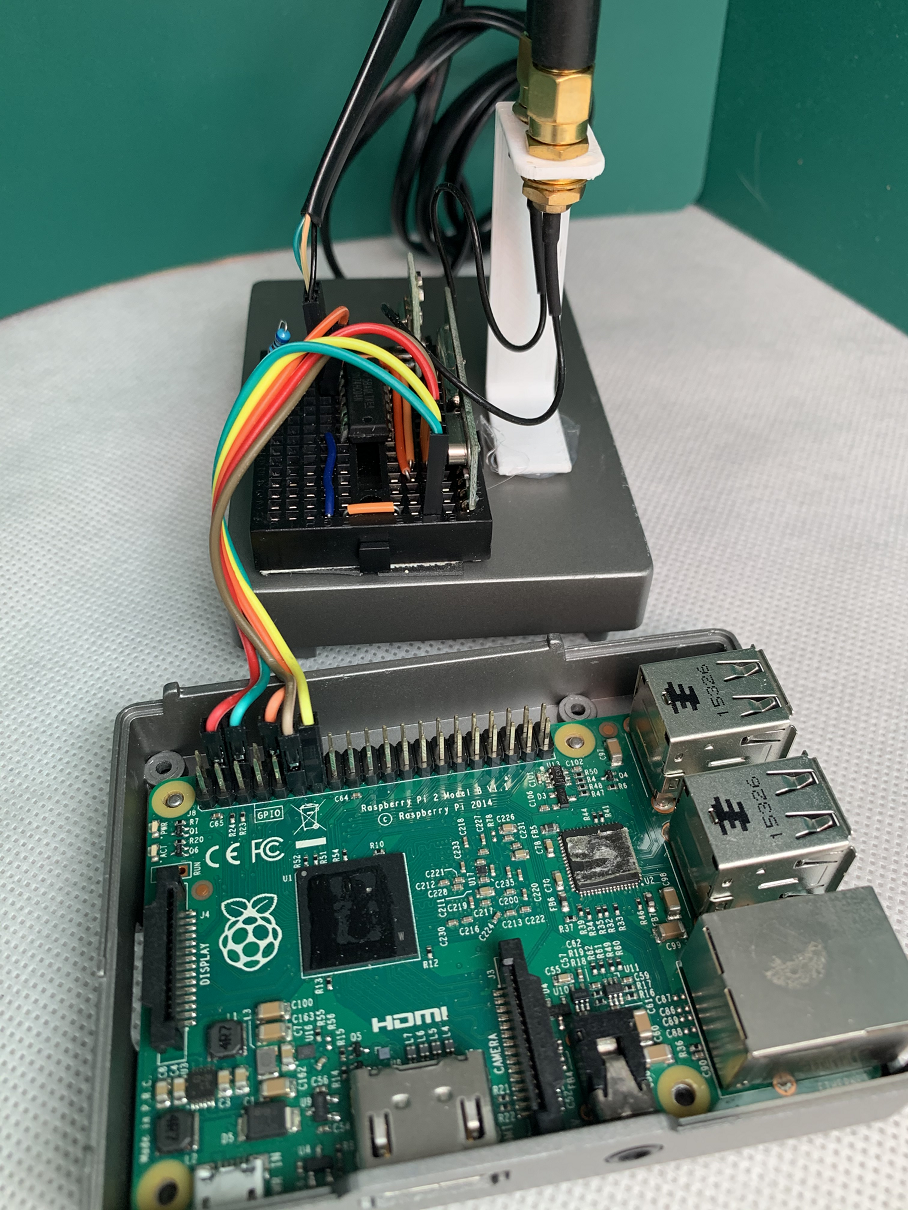
See the electronics image above or download fritzing scheme The parts I used are:
- Rapberry Pi model 2 + fast SD card. (16Gb is enough for me).
- 433 Mhz Superheterodyne RF Receiver and Transmitter Module > link to product This module is only needed if you want to switch 433 Mhz devices (klikaanklikuit, and other)
- Antenna for 433 Mhz > link to product
- Inverter for serial communication with smart-meter such as kaifa > link to product
- Resistor (6.8k or 10k ohm)
When ordering parts, please be so kind to use my referral link
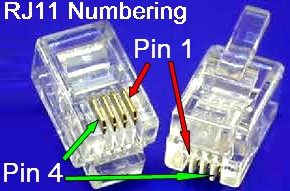
P1 - Smart meter connection
For the wiring of the P1 port (telephone jacket) only three connections are needed (see fritzing diagram above):
| Pin nr | Function |
|---|---|
| 1 | NC (not connected) |
| 2 gold color line (connected to 5v) | RTS (Request to send) |
| 3 green color line (connected to GND) | GND (Ground) |
| 4 | NC (no connected) |
| 5 black color line (connected to inverter > Rx port of Pi) | TxD (Transmit data) |
| 6 | NC (not connected) |
So are you all connected!? Great lets take a look at the software part!
Software
- Download the latest version of Raspbian lite (I am running Raspbian Buster Lite) > link to download
- Download BalenaEtcher so that you can burn Raspbian to your SD card
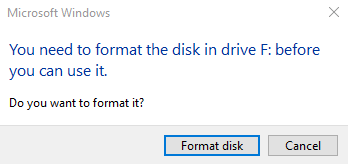
- After flashing, remove the SD card and insert it back into your computer. Click Cancel on all format windows:
- Create a file called ‘ssh’ without fileextension! on the boot-drive so that we can connect using a terminal service
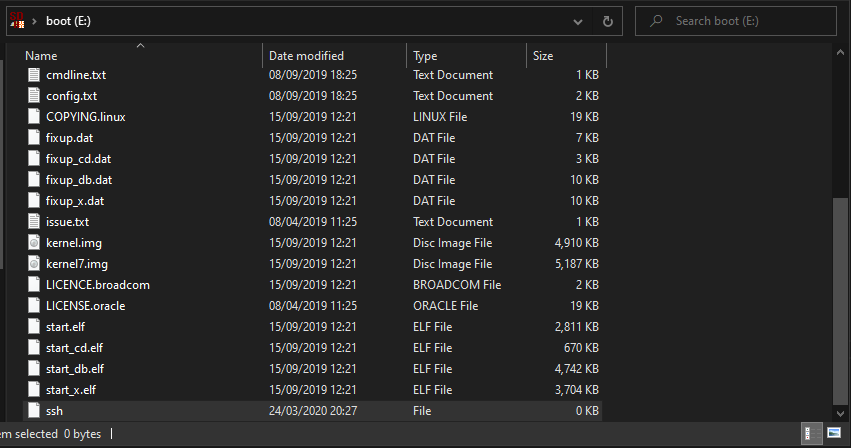
- If you connect using a UTP cable, you are done and power-up your raspberry.. If you connect using WIFI then see this post about headless installation
- In order to connect using SSH (on a Windows machine) I use this program from the Microsoft Store
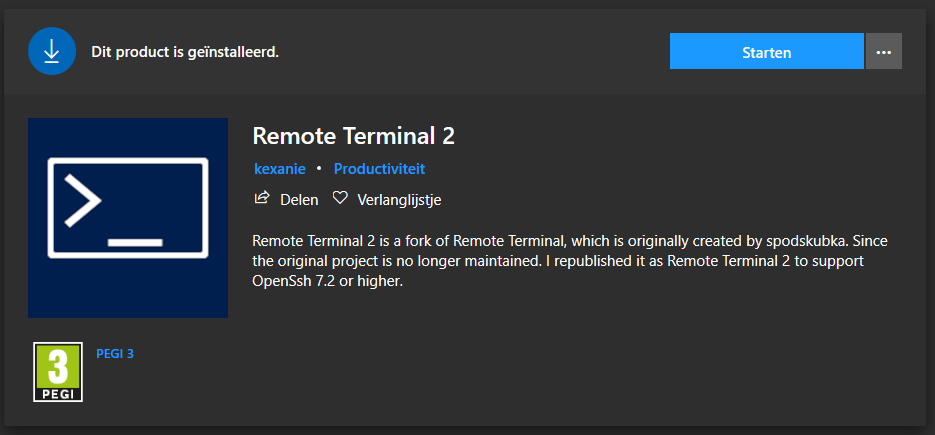
- Lookup the IP address of your connected Raspberry using your router and connect using the terminal program in step 6. Default password = “raspberry”
- Change the password of the pi user-account
sudo passwd pi
- Install latest updates
sudo apt-get update --allow-releaseinfo-change
sudo apt-get upgrade
- Change settings
sudo raspi-config
Navigate using the menus and change the following settings:
- 2 hostname) Change the hostename in 'domoticz' (or whatever you like)
- 4 localization options, I2 change time zone) Change time zone to your time zone (mine is Europe + Amsterdam)
- 5 interfacing options, P6 serial
	* Login shell to be accessible > NO
    * Serial port hardware enable > Yes
- Reboot your raspberry
- Install Mosquitto (optional) MQTT message broker
sudo apt install mosquitto
- Install Domoticz
curl -L install.domoticz.com | sudo bash
- Install software for 433 Mhz
git clone https://github.com/WiringPi/WiringPi.git
cd WiringPi
./build
cd ..
git clone git://github.com/ninjablocks/433Utils.git --recursive
cd 433Utils/RPi_utils
make all
Installation of Dashticz (optional) > Useful for advanced home screen customizations See dashticz installation instructions
Install PiHole (optional) > The raspberry is also a great add-blocker and since it is always running why not make use of this
curl -sSL https://install.pi-hole.net | bash
Software installation part is all DONE, Congratulations. lets go to the configuration of Domoticz.
Backup
SD cards WILL fail after some period, so it is highly recommended to make backups of your Domoticz database. I use a USB stick for this that is permanently attached to one of the USB ports of the raspberry PI. For this only a small USB stick is needed, I used a 4 gig stick that I got for free somewhere. We need to mount this USB stick automatically on every boot using the following instructions:
- Get the ID of the USB device, it will be named sda1
ls -l /dev/disk/by-uuid/
You should see something like the picture below, the ID of my USB stick is 44D4-0B4, write down your ID for step 3.

- Edit /etc/fstab
sudo nano /etc/fstab
- Then add the following line at the end (replace 44D4-0B4):
UUID=44D4-0B4 /media/usb vfat auto,nofail,noatime,users,rw,uid=pi,gid=pi 0 0
- create backup.sh
sudo nano ./backup.sh
- copy the following into backup.sh and save the file (crtl+X and Y)
tar -vcf ./domoticz/domoticz-db.tar ./domoticz/domoticz.db ./domoticz/domoticz.db-wal ./domoticz/domoticz.db-shm
rsync -avzh ./domoticz/domoticz-db.tar /media/usb/daily/
- make backup.sh executable
sudo chmod +x backup.sh
- edit crontab
crontab -e
- and add the following lines for a daily, weekly and monthly backup
0 5 * * * ./backup.sh
0 5 * * 0 rsync -avzh ./domoticz/domoticz-db.tar /media/usb/weekly/
0 5 * 1-12 0 rsync -avzh ./domoticz/domoticz-db.tar /media/usb/monthly/
Domoticz configuration
Start your browser and connect to http://192.168.0.16:8080/#/Dashboard (your IP-Address will be different)
Go to Settings > Hardware (the screenshot below is of my configuration, but I will describe the steps below)
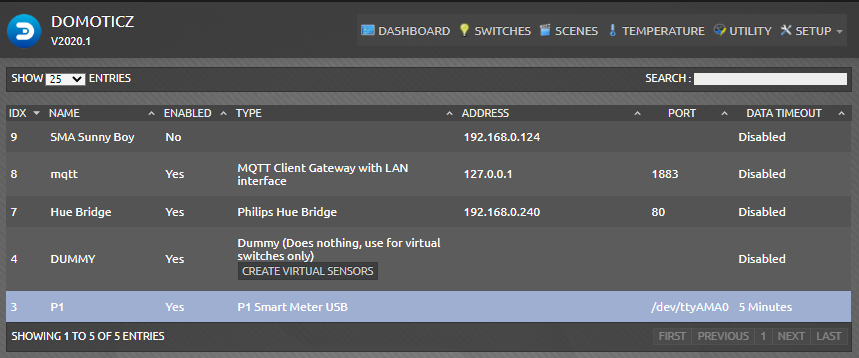
First, lets add the hardware to see if we can get data from the smart-meter.
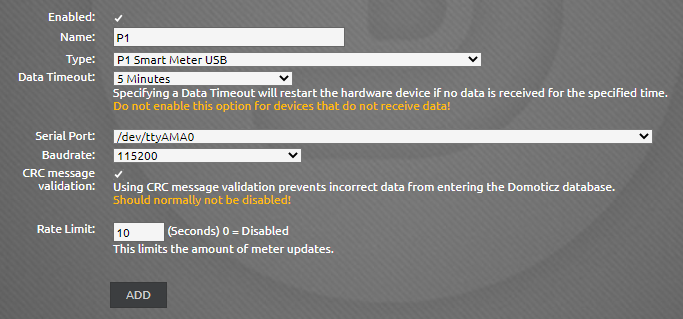
Add a device with the following settings:
Next add the MQTT device
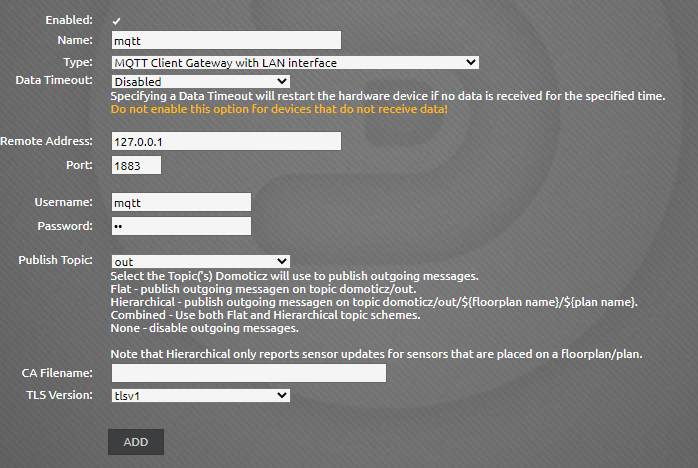
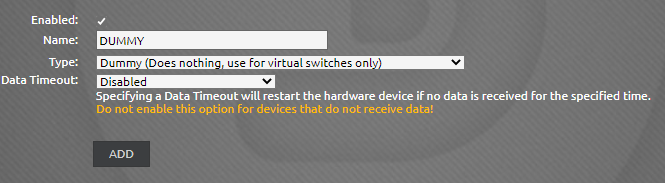
Finally add a Dummy device
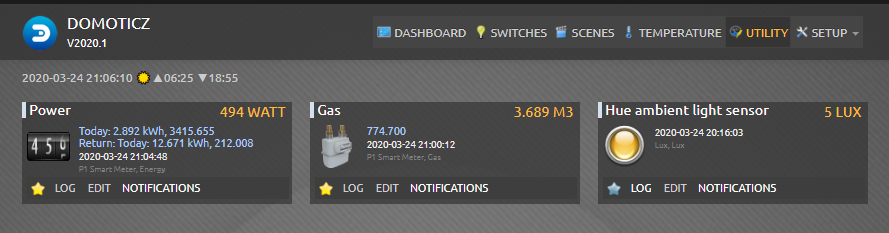
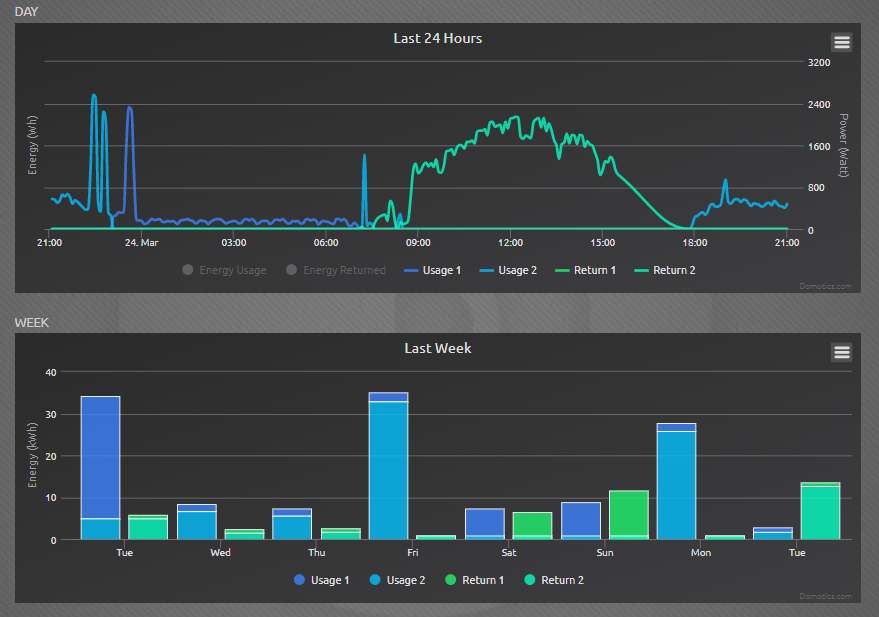
If everything is fine you should be able to see the following:
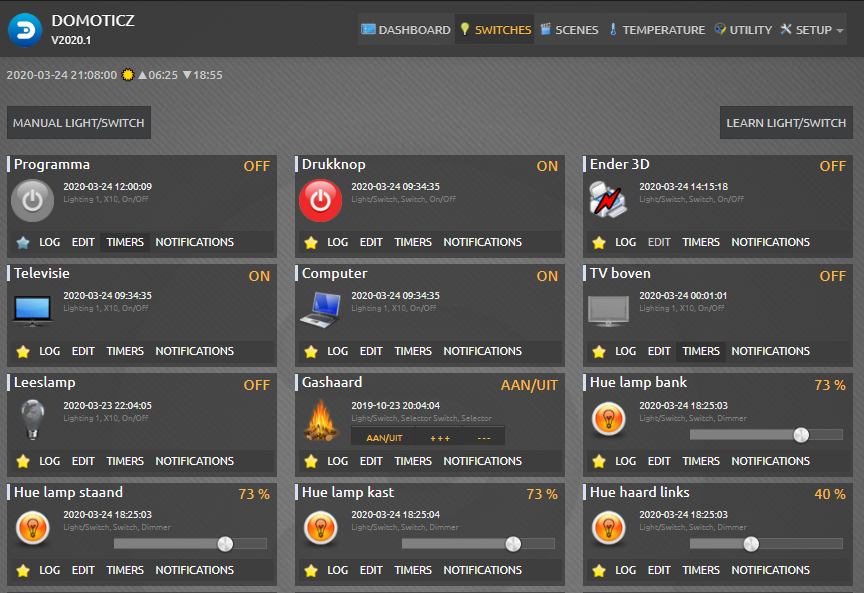
Add a switch to operate 433Mhz devices
Here you can see some of my switches, most are WIFI connected devices, but some are still 433Mhz klikaanklikuit. I will describe how to add these.
First you will need to know the code of the 433 signal. So you will need the remote that came with the 433 device. This remote works best for me:

- Login on your domoticz server using SSH
cd 433Utils/RPi_utils/
./RFSniffer
If all went well you should see the codes received by the 433 Mhz Superheterodyne RF Receiver.
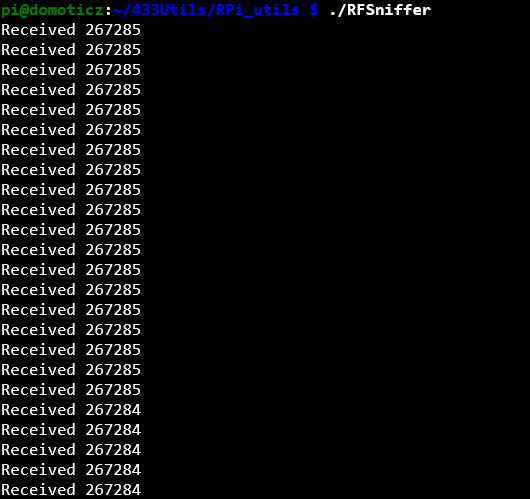
Press the on-and off button, because these codes are different and you will need them both. Make sure you are well within range of the receiver (max 50 cm)
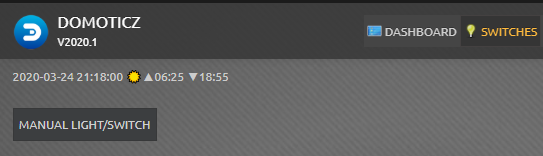
Now that we know the code we can go back to Domoticz and add a virtual-switch. Select the Manual Light/Switch button:
And select a not used House-code, unit-code.

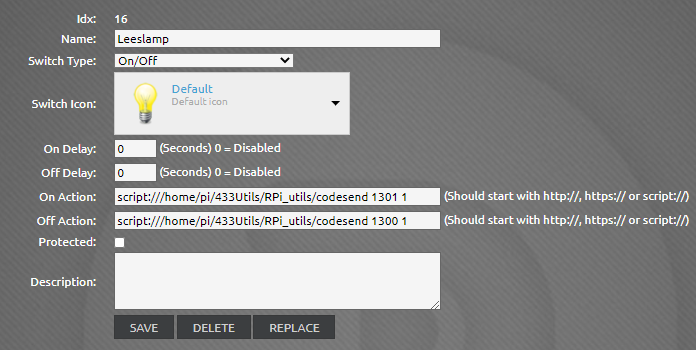
Edit the created switch and enter the following On/Off actions:
script:///home/pi/433Utils/RPi_utils/codesend [code of step above] 1
Add some cool hardware
Did you know that Domoticz has some great ‘HARDWARE’ devices that are basically just software services? To add them, once again go to the Setup > Hardware and add “Buienradar”
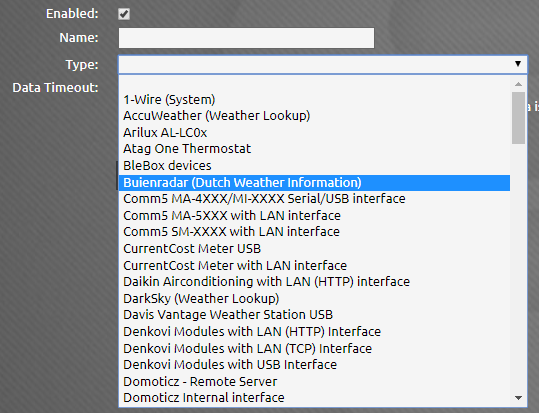
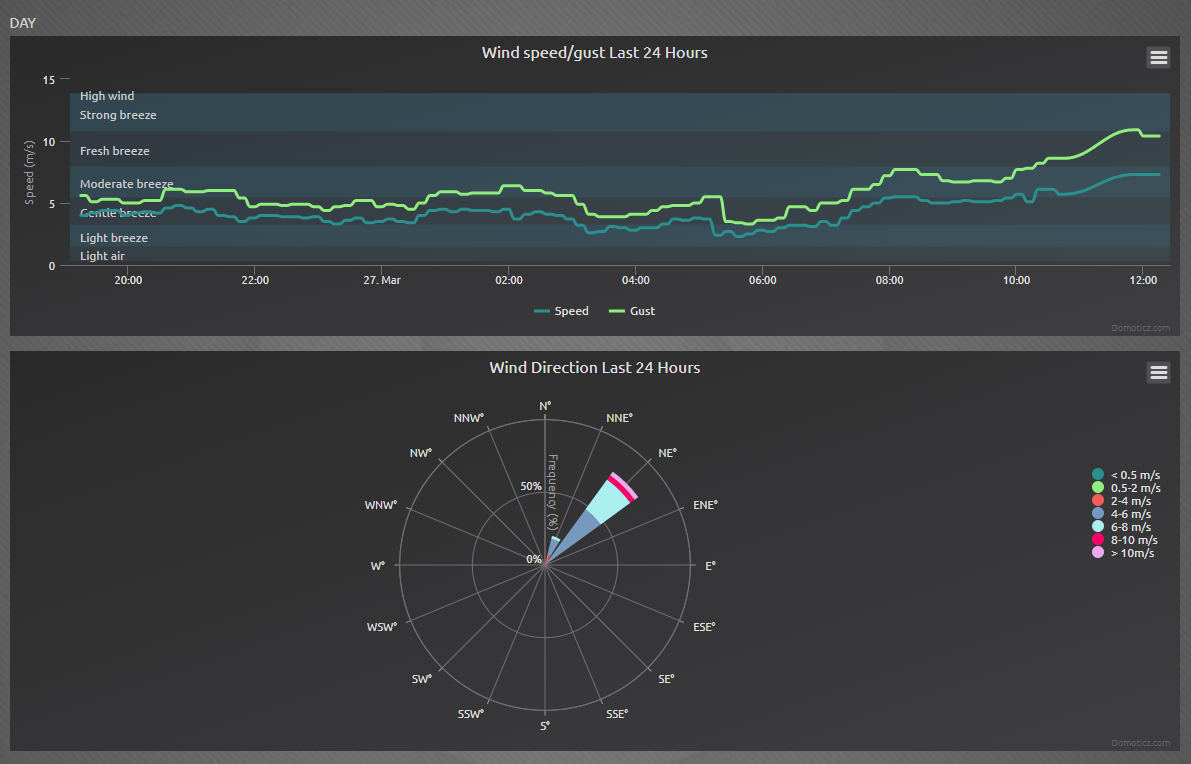
Using this you will get a lot of new devices with all sorts or weather information

Have a look at the WIND dashboard, how cool is this!
Other useful HARDWARE options to add are:
- Wake-on-LAN (To turn on you Synology NAS for instance, or any other device that supports WOL)
- With the latest release of Domoticz there is now even a Tesla hardware type.
All Done! Please drop a line and let me know if it worked or not. Would be great to hear if this was helpful. If this project help you reduce time to develop, you can give me a cup of coffee 😄
![]()