
WSL 2 and docker compose
With the arrival of WSL 2 (Windows Subsystem for Linux), I thought it was a good time to learn more about this technology. I am surprised at the possibilities this offers. So let’s dive into this and use WSL 2 and Docker-Compose to fire up some containers to present sensor data in a Grafana dashboard.

The Windows Subsystem for Linux lets developers run a GNU/Linux environment – including most command-line tools, utilities, and applications – directly on Windows, unmodified, without the overhead of a traditional virtual machine or dualboot setup. For more background information and installation instructions have a look at this Microsoft Docs page.
A big advantage of WSL 2 is that it uses little system resources and is super fast.
This makes it a perfect solution for a microservices architecture, since there is almost no penalty for using multiple containers. By using Docker-Compose we can easily separate the components that an application needs into multiple docker containers. In this example MySql, Grafana and a development container. You no longer have to go through an installation procedure of MySql or Grafana yourself. You literally take (compose) what others have created for you.
But why do we use docker compose you might ask.
Docker compose provide connectivity between the containers. It allows network traffic. In this example we need network traffic between Grafana and MySql because Grafana itself does not store any data. A next step would be to use Kubernetes instead of docker compose but that’s for another blog.
All of the code is in my Github repro so make a clone and follow along.
Prerequisites
- WSL2: see link
- Docker Desktop see link
- Docker compose (This will be installed by default in step 2)
- Git, for example git for Windows
Steps to follow in this guide
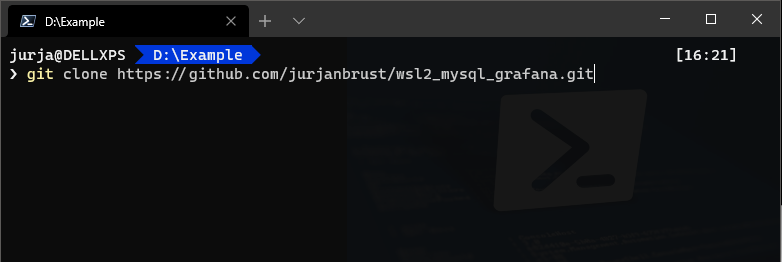
First clone the repository into some directory (mine is called D:\Example)
git clone https://github.com/jurjanbrust/wsl2_mysql_grafana.git
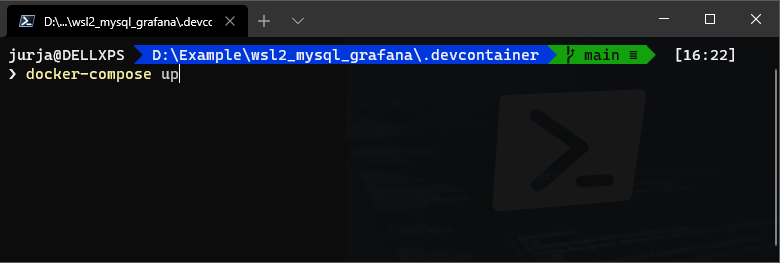
Next, change the directory into the .devcontainer folder
cd .\wsl2_mysql_grafana\.devcontainer\
and start the containers using:
docker-compose up
Next login on the ‘development’ container so that we can create the database in the MySql container.
First, we need to know the name of the container that we will login, so do a ‘docker container list’ in the command prompt (I highly recommend Windows Terminal, see this link for installation instructions)
 On my laptop the container name is called ‘devcontainer_dev_1’. (yours may be different!)
Use ‘docker exec -it yourcontainername bash’ to login in the container using bash.
On my laptop the container name is called ‘devcontainer_dev_1’. (yours may be different!)
Use ‘docker exec -it yourcontainername bash’ to login in the container using bash.
 Then ‘cd workspace’ and ‘python setup_database.py’ to create the database.
Now you can also add some sample data using ‘python insert_fake_sensordata.py’ as displayed below.
Then ‘cd workspace’ and ‘python setup_database.py’ to create the database.
Now you can also add some sample data using ‘python insert_fake_sensordata.py’ as displayed below.

Next open the browser and navigate to the Grafana website located on your localhost port 3000
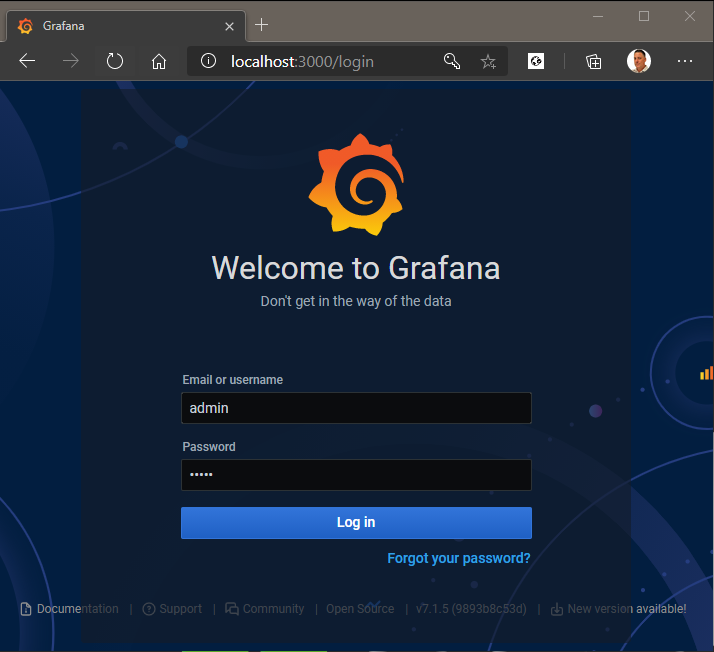
The default password/username is admin/admin. You can skip the step to change the password.
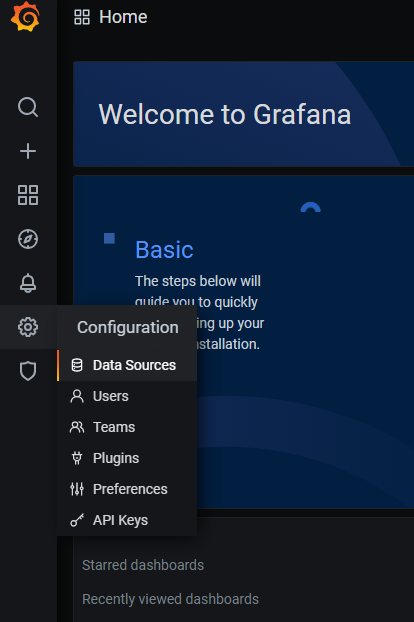
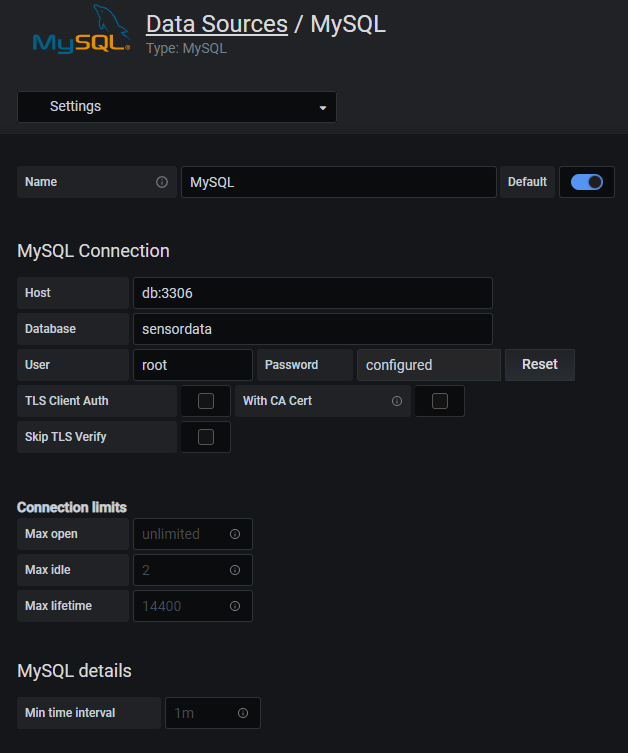
Next we need to add a data connection to the MySql database that is running in another container. So use the left navigation menu and select ‘Data Sources’. Click Add data source and filter and select MySql.
Enter the following information as displayed in the image below. The username = ‘root’ and password = ’example’
Notice that for the MySQL Host we can use ‘db’ instead of an IP address. This is done by docker-compose. You can see this in the ‘docker-compose.yml’ file (line # 16).
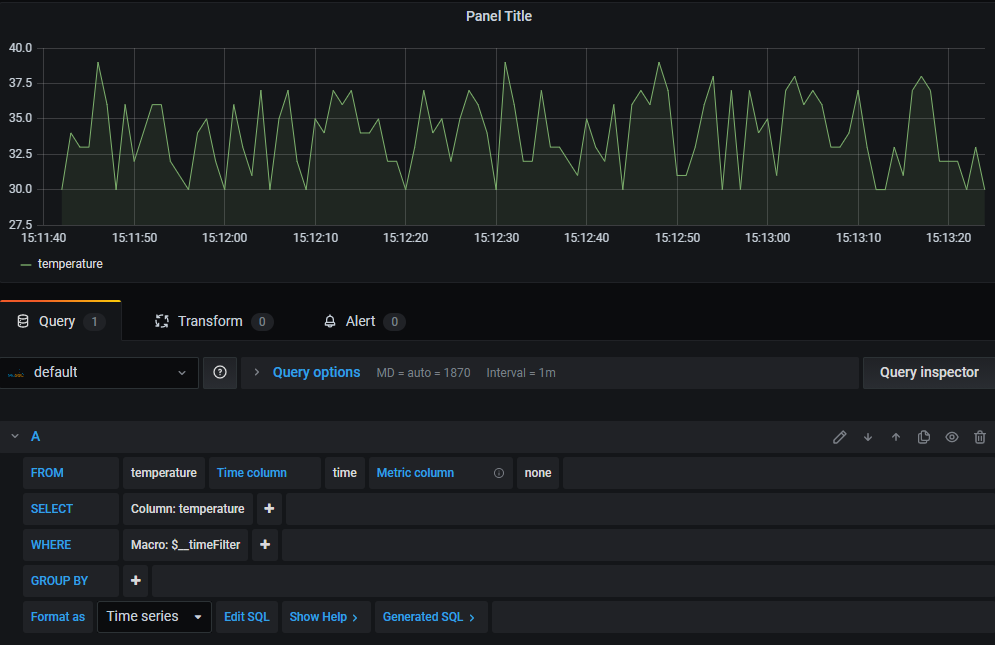
Finally go back to Grafana and add a new dashboard + panel like the one displayed below and you are done!
If you want, you can also use the browser to login to on Adminer (port 8080). Adminer is a GUI to manage MySQL. Click here to do so. As you might have noticed Adminer is also running in a seperate container. Can you see how loosely coupled all these services are? Containers open up a new world in the field of application architecture. Like a menu card where you pick the technologies you need.
Sources
For a change I didn’t use C # but Python this time and I really like this language so I will definitely use it more often from now on.
First the code to create the database and SQL table. As soon as I finished this Python script I realized there must be more efficient ways to preload a SQL database. By including a .sql file in the docker-compose.yml file, this should also be possible. However, I have not yet studied this. So something for my to-do list.
 1import mysql.connector
 2
 3mySql_dbName = "sensordata"
 4mySql_tableName = "temperature"
 5mySql_password = "example"
 6mySql_droptable = False
 7
 8db = mysql.connector.connect(
 9  host="db",
10  user="root",
11  passwd=mySql_password,
12)
13
14cursor = db.cursor()
15try:
16    cursor.execute("CREATE DATABASE IF NOT EXISTS " + mySql_dbName)
17except Exception as ex:
18    print(ex)
19
20db = mysql.connector.connect(
21  host="db",
22  user="root",
23  passwd=mySql_password,
24  database=mySql_dbName
25)
26cursor = db.cursor()
27
28if(mySql_droptable):
29    try:
30        cursor.execute("DROP TABLE " + mySql_tableName)
31        print("Deleted table" + mySql_tableName)
32    except Exception as ex:
33        print(ex)
34
35try:
36    cursor.execute("CREATE TABLE "+ mySql_tableName + " (id INT AUTO_INCREMENT PRIMARY KEY, counter INT, temperature INT, time TIMESTAMP, latitude FLOAT, longitude FLOAT, rssi FLOAT, dev_id VARCHAR(20), app_id VARCHAR(20), hardware_serial VARCHAR(20) )")
37    print("Created table" + mySql_tableName)
38except Exception as ex:
39    print(ex)
Then second a script to fill the temperature table with fake data.
 1import os, uuid, time, json, random
 2import mysql.connector
 3from datetime import datetime
 4
 5mySql_dbName = "sensordata"
 6mySql_tableName = "temperature"
 7nrOfMessages = 100
 8
 9db = mysql.connector.connect(
10  host="db",
11  user="root",
12  passwd="example",
13  database=mySql_dbName
14)
15cursor = db.cursor()
16
17def processMessage():
18    sensor_counter = random.randrange(1,4000,1)
19    sensor_temperature = random.randrange(30,40,1)
20    sensor_time = datetime.today()
21    sensor_latitude = "123.22"
22    sensor_longitude = "334.22"
23    sensor_rssi = random.randrange(-100,-0,1)
24    sensor_dev_id = "223423434"
25    sensor_app_id = "3322334"
26    sensor_hardware_serial = "sensor1"
27
28    print("counter: " + str(sensor_counter) + " temp: " + str(sensor_temperature))
29    sql = "INSERT INTO " + mySql_tableName + " (counter, temperature, time, latitude, longitude, rssi, dev_id, app_id, hardware_serial) VALUES (%s, %s, %s, %s, %s, %s, %s, %s, %s)"
30    val = (sensor_counter, sensor_temperature, sensor_time, sensor_latitude, sensor_longitude, sensor_rssi, sensor_dev_id, sensor_app_id, sensor_hardware_serial)
31    try:
32      cursor.execute(sql, val)
33      db.commit()
34    except Exception as ex:
35      print(ex)
36
37for item in range(0, nrOfMessages, 1):
38    processMessage()
39    time.sleep(1)
40
41print("All Done")Third, and this is actually the script as I use it myself, to read out an azure queue. I needed this scenario for a project that I completed in the past See my LoRaWan post
 1from azure.storage.queue import (
 2        QueueClient,
 3        TextBase64EncodePolicy,
 4        TextBase64DecodePolicy
 5)
 6
 7import os, uuid, time, json
 8import mysql.connector
 9from datetime import datetime
10
11connect_str = "DefaultEndpointsProtocol=https;AccountName=replace;AccountKey=replacewithyours;EndpointSuffix=core.windows.net"
12queue_name = "name of queue"
13
14mySql_dbName = "sensordata"
15mySql_tableName = "temperature"
16
17queue_client = QueueClient.from_connection_string(conn_str=connect_str, queue_name=queue_name, message_decode_policy=TextBase64DecodePolicy())
18messages = queue_client.receive_messages(messages_per_page=5)
19
20db = mysql.connector.connect(
21  host="db",
22  user="root",
23  passwd="example",
24  database=mySql_dbName
25)
26cursor = db.cursor()
27
28def processMessage():
29    message_json = json.loads(message.content)
30    payload_raw = message_json["payload_raw"]
31    payload_bytes = bytes(payload_raw, 'ascii')
32    sensor_counter = payload_bytes[0] + 256 * payload_bytes[1]
33    sensor_temperature = payload_bytes[2] + (payload_bytes[3] / 100)
34    sensor_time = message_json["metadata"]["time"][0: 19]
35    sensor_latitude = message_json["metadata"]["latitude"]
36    sensor_longitude = message_json["metadata"]["longitude"]
37    sensor_rssi = message_json["metadata"]["gateways"][0]["rssi"]
38    sensor_dev_id = message_json["dev_id"]
39    sensor_app_id = message_json["app_id"]
40    sensor_hardware_serial = message_json["hardware_serial"]
41
42    print("counter: " + str(sensor_counter) + " temp: " + str(sensor_temperature))
43    sql = "INSERT INTO " + mySql_tableName + " (counter, temperature, time, latitude, longitude, rssi, dev_id, app_id, hardware_serial) VALUES (%s, %s, %s, %s, %s, %s, %s, %s, %s)"
44    val = (sensor_counter, sensor_temperature, sensor_time, sensor_latitude, sensor_longitude, sensor_rssi, sensor_dev_id, sensor_app_id, sensor_hardware_serial)
45    try:
46      cursor.execute(sql, val)
47      db.commit()
48    except Exception as ex:
49      print(ex)
50
51for message in messages:
52    processMessage()
53    queue_client.delete_message(message.id, message.pop_receipt)
54    time.sleep(0.1)
55
56print("All Done")
57
See details of connecting to a storage queue from python on this Microsoft Docs page
This brings this blog post to an end. I hope you found it fun and educational to read. With the arrival of WSL2 it becomes very nice and easy to develop on a Linux-based operating system.